How to send invitations by text, step by step
Collect guests' permission, add their numbers, write one invitation with an RSVP link, and send it so each guest gets their own text. Here's every step, with screenshots, plus what your guests see.
The short answer: get each guest's OK to text them, put their mobile numbers in one list, and write one short invitation that includes an RSVP link. Then send it so every guest gets their own text instead of landing in a group chat. Guests answer with a tap, and anything they text back comes only to you.
You can do this from your own phone for a handful of people. Once the list is longer than that, a tool that sends individually and collects replies saves you a lot of copying and pasting. The steps below use Text My Event. The screenshots come from a test event with made-up guests.
Before you start: get permission
Texting is personal, so ask first. A quick "Can I text you the details for Leo's party?" in person, on a call, or in a message they already expect is enough for friends and family. Tell people roughly how many texts to expect and that they can opt out at any time.
Text My Event builds this into sending. You can't text a guest until you confirm that they agreed, and every guest can reply STOP to opt out. More on both in steps 3 and 6.
Step 1: Create the event
Sign up with your name, email, and mobile number, then enter the code we text you. A short setup asks what you're planning, the event name and date, and roughly how many guests you expect.
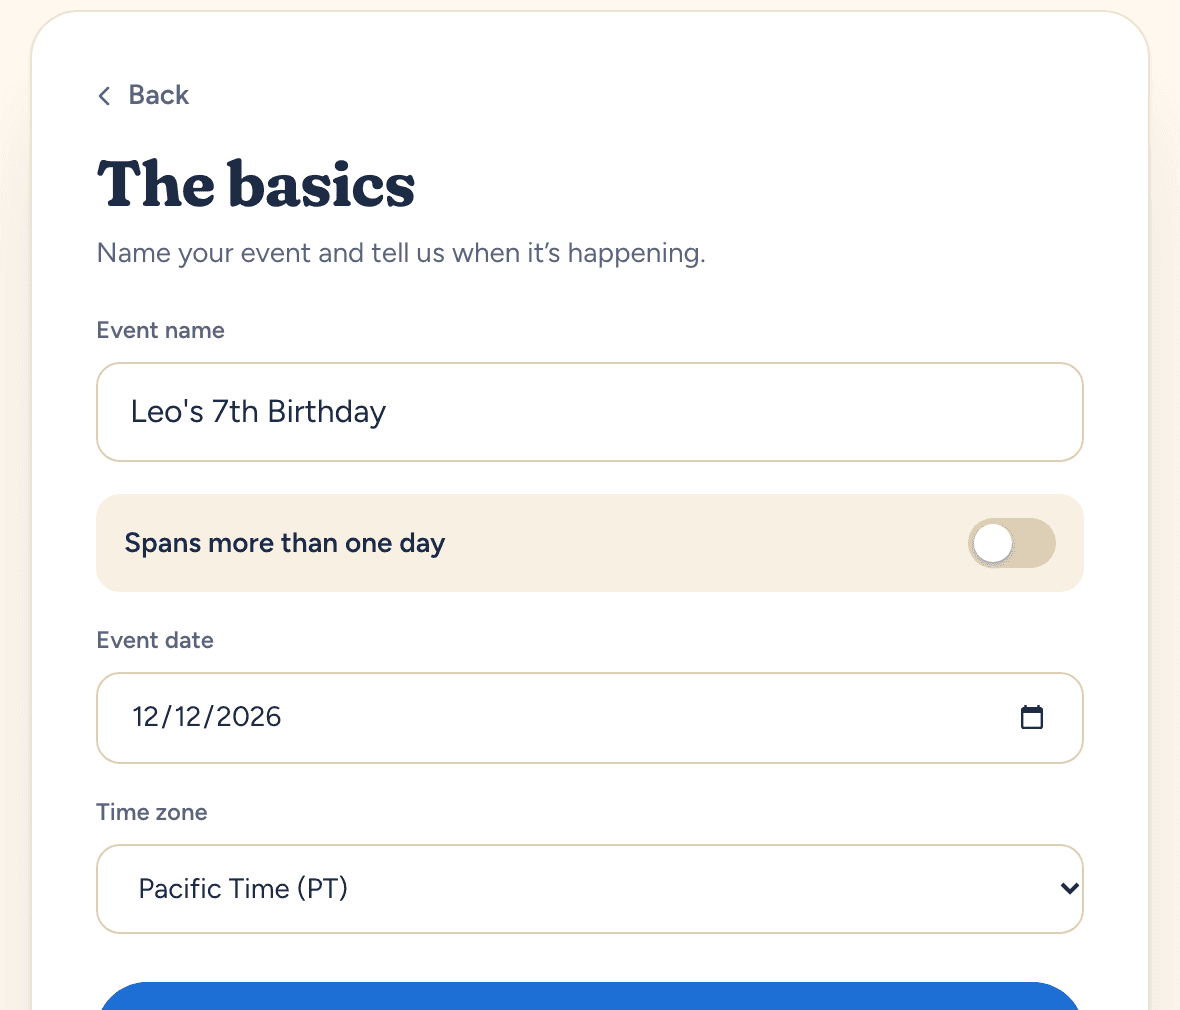
Add the venue and host name in Settings afterward. The message tokens fill those in for you later.
Your first event comes with 10 free texts. They only go to your own verified number (and your co-hosts'), so you can see exactly what guests will get before you pay anything.
Step 2: Add your guests
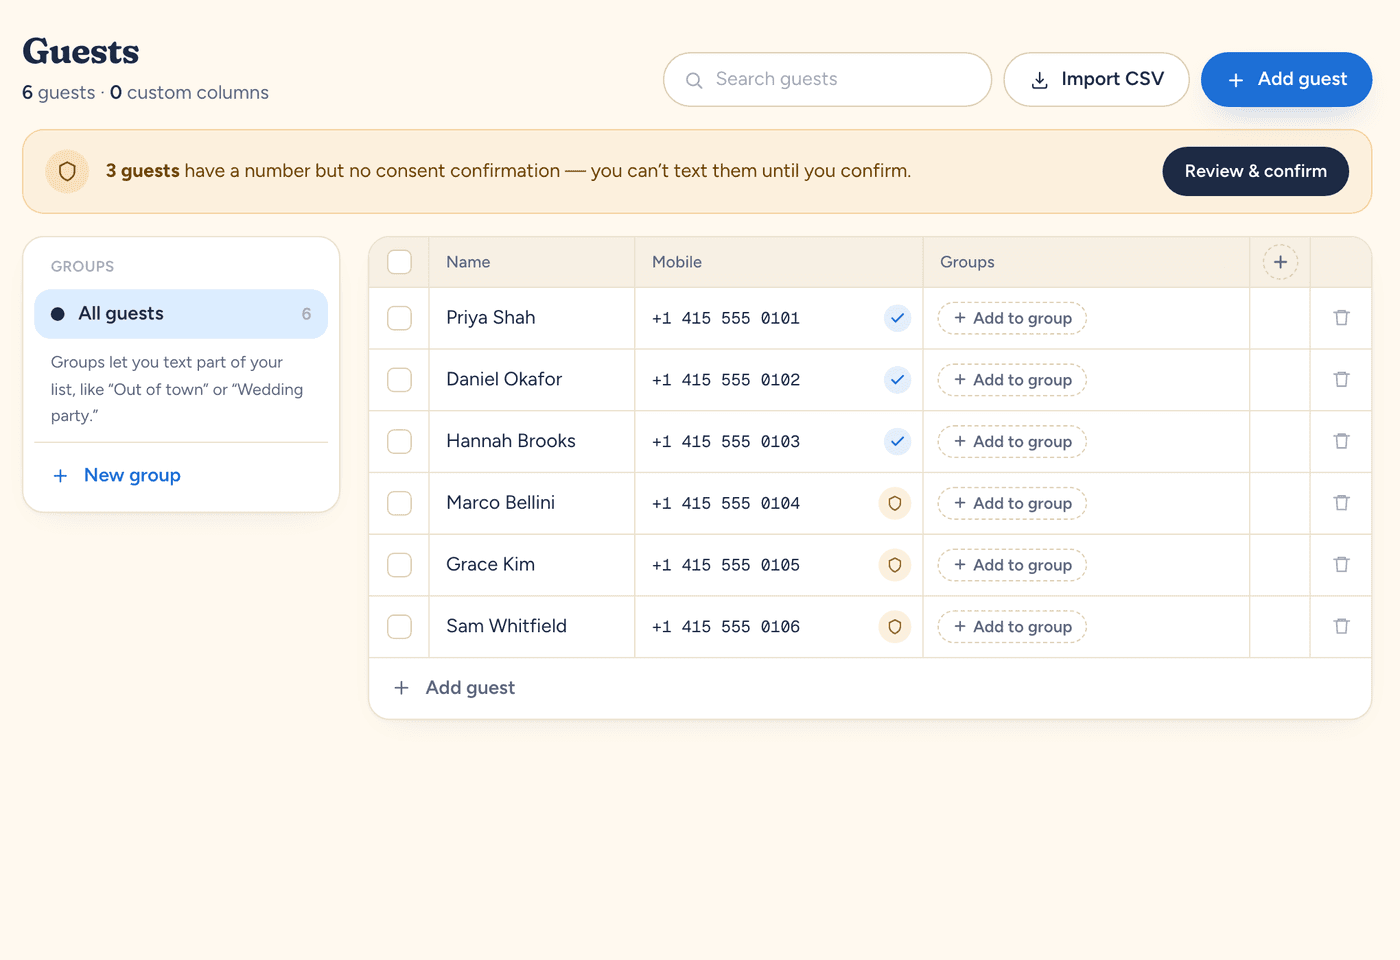
On the Guests page, choose Add guest to type people in one at a time, or Import CSV to paste rows from a spreadsheet or upload a CSV or Excel file. Numbers need to be US or Canadian (+1) mobiles. You can type them in any format.
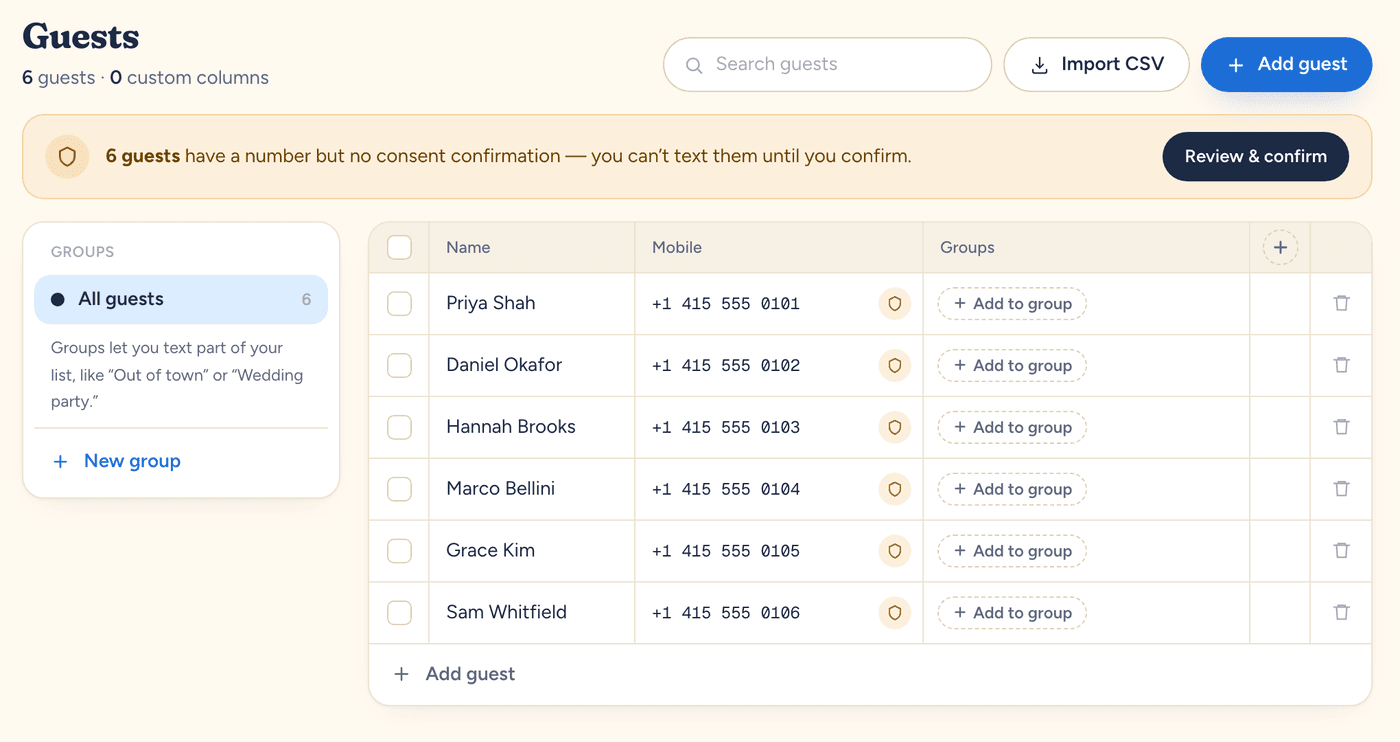
Use groups (like "Kids' parents" or "Out of town") if you'll want to text part of the list later.
Step 3: Confirm that your guests agreed
Choose Review & confirm. You'll see everyone you haven't confirmed yet. Tick the box only if it's true:
I have permission to text these guests about this event.
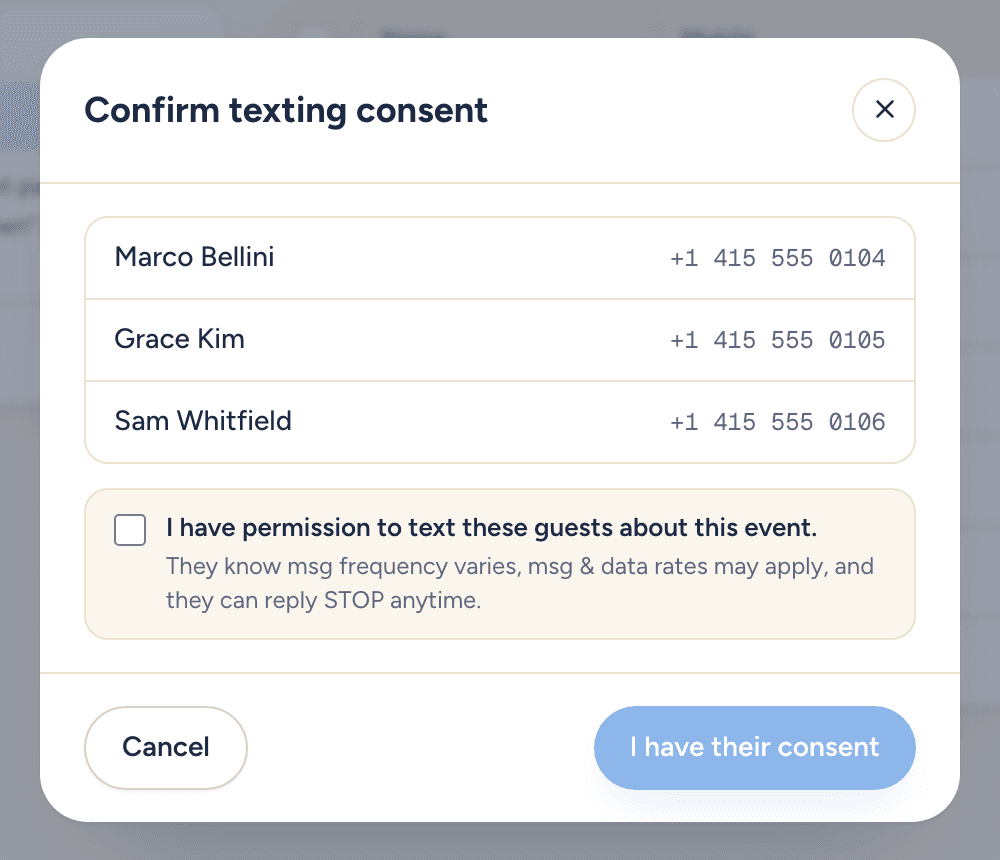
Guests who RSVP through your form opt in themselves, so you don't need to confirm them separately.
Step 4: Build your RSVP form
Under RSVPs, create a form. A new form already asks "Can you make it?" and "How many in your party?", and you can add short-answer or multiple-choice questions such as allergies or which day someone can come. Publish it, and its link becomes available as the {RSVP link} token in any message.
Step 5: Write the invitation and send or schedule it
Go to Messages and write one invitation. Use Personalize to insert tokens like {First name}, {Event date}, {Venue}, and {RSVP link}. Each guest's text fills in their own name, and the live preview shows how it will look on a phone.
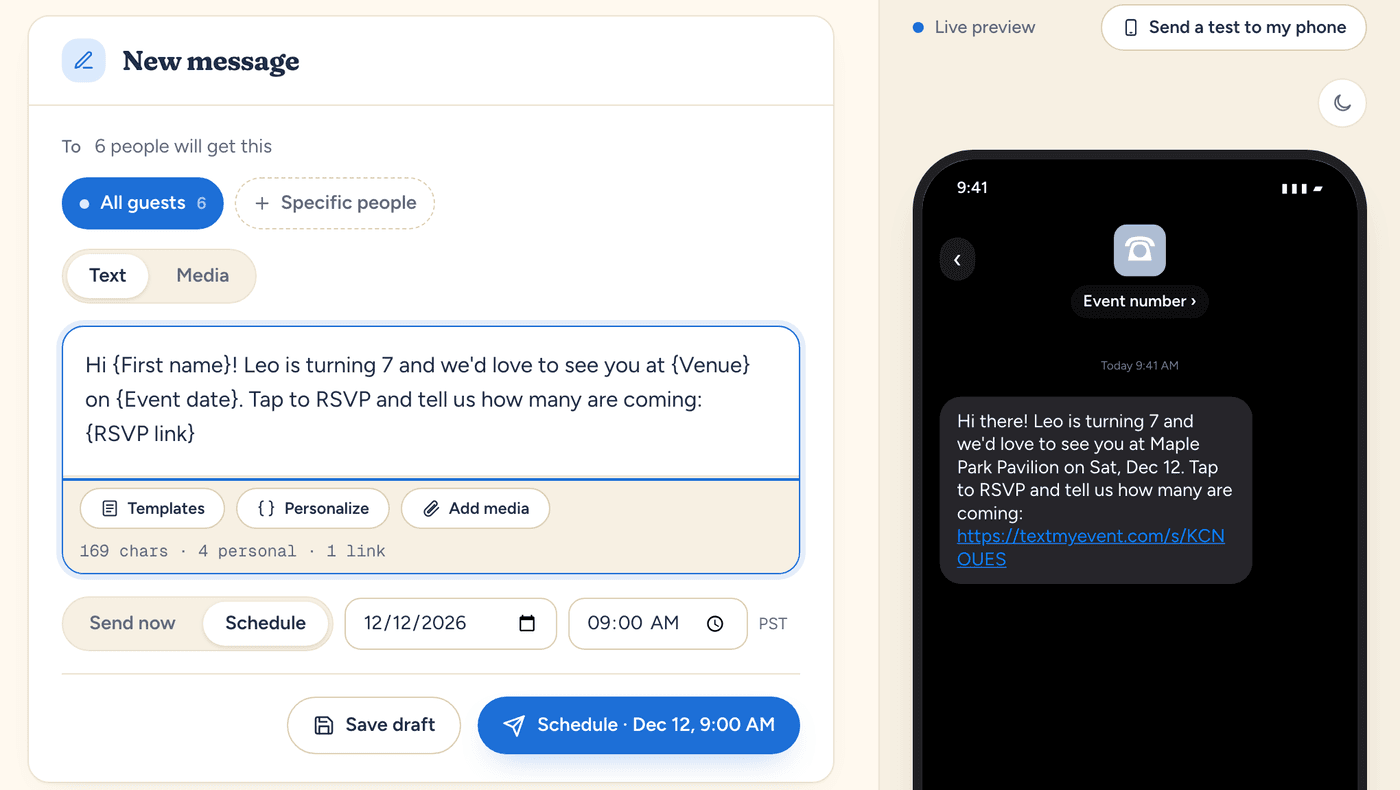
A good invitation text is short. Put the who, what, and when first, then the link:
You can also add a picture, such as an invitation card, with Add media. Choose Send now, or Schedule for a date and time. Use Send a test to my phone first.
Each guest gets one text per message, however long it is. To text your guest list (not just your own phone), you pay once for the event. There's no subscription: Lite is $19 for 50 texts, Starter is $57 for 500 texts, Plus is $87 for 1,200 texts, and Premium is $137 for 2,000 texts.
What your guests see
- A normal text from a Text My Event number. No app and no account. It isn't a group thread, so guests never see each other's numbers or replies.
- A one-time welcome. Before a guest's first message, they get a short notice that they're receiving texts about your event, with HELP and STOP instructions.
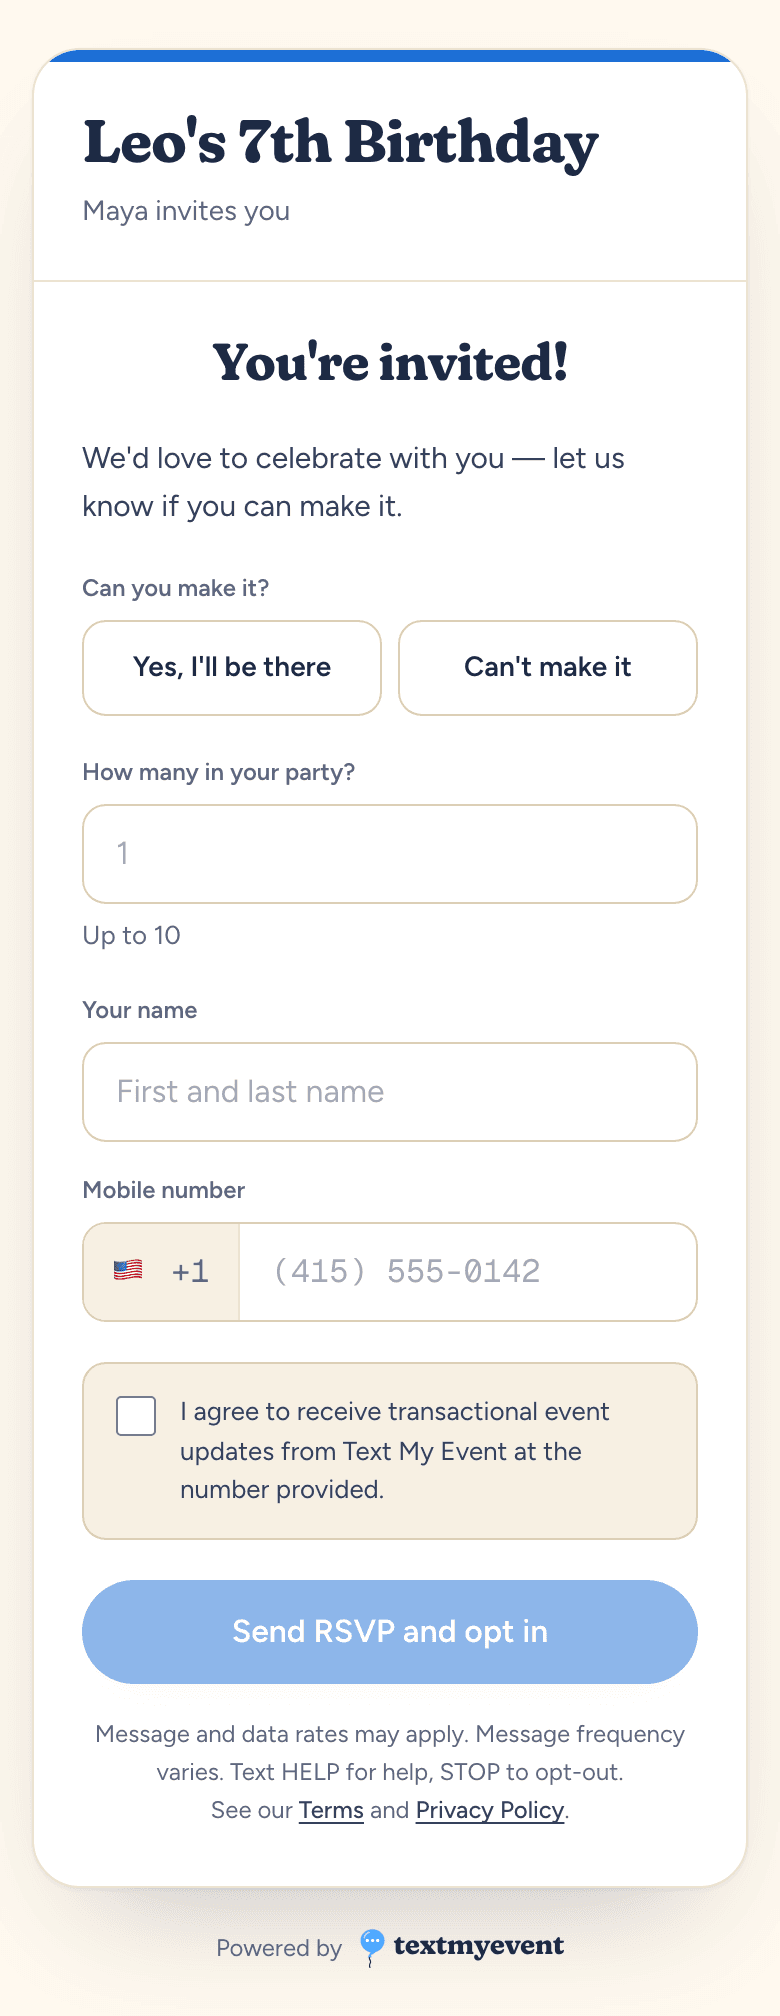
- A short form when they tap the link. They answer your questions, enter their name and mobile number, and tick a box to agree to event texts. Their answer lands in your headcount.
Step 6: Handle replies, RSVPs, and opt-outs
Anything a guest texts back lands in your Replies inbox, where you can answer them one-on-one. Co-hosts you add share the same inbox.
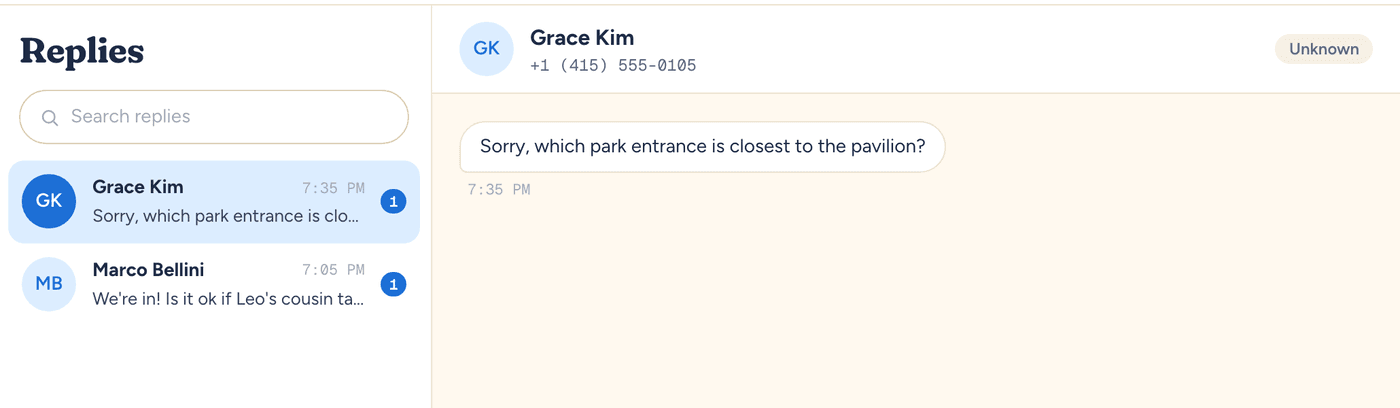
One thing to know: a plain-text "yes" doesn't change your headcount. Only the form does that. If someone answers by text, you can set their RSVP status yourself in the form's Guests view. That view also shows who hasn't answered yet.
If a guest replies STOP, they're opted out right away and skipped on later sends. They can reply START to get texts again. You don't have to track any of it yourself.
Quick checklist
- Ask guests before you text them.
- Add their +1 mobile numbers.
- Confirm consent for anyone who didn't opt in through your form.
- Publish an RSVP form so answers are added to your headcount.
- Write one short invitation with
{First name}and{RSVP link}, send a test, then send or schedule it. - Answer replies and follow up with whoever is still marked "No reply." Our guide to asking for an RSVP after the deadline has wording you can use.
Want to see what it looks like on your own phone first? The 10 free texts on your first event are for exactly that.
Run this for your next event.
Schedule your texts in minutes. Try it with 10 free texts to your own phone. No app for guests, no credit card.
Start freeWritten by the people who build Text My Event, and checked step by step against the product as it works today.